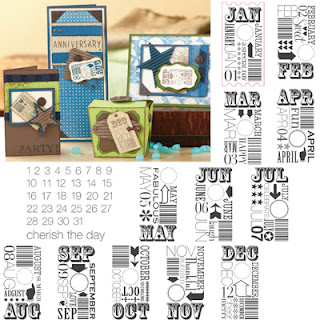
The stamps fit perfectly on a 1 x 2 piece of cardstock or use the Cricut Cartridge to cut out a ticket shape! You can see the tag cut out around the January Stamp below.
I created an interchangeable calendar using a CTMH Memory Game Box and used the Stamp of the Month below. There is one "coaster" for each month inside the box. It has a monthly calendar on one side and a photo on the other side. I adhered the flap of a 3x3 plastic envelope to the top of the box so the envelope hangs over the back. The calendars/photos fit inside the envelope to interchange throughout the year. The side that has the magnetic flap is actually now the back instead of the front. If you would like to make one of these then stay tuned for information on my workshop coming soon!
 |
| Corner View of "Back" |
 |
| Top View |
 |
| Front View with Calendar Showing |
 | ||
| Front View with Photo Side Showing |
 |
| Front Showing Clear Envelope Where the Coaster is Inserted |
Recipe:
X7142B Dreamin' Level 2 Paper Packet
Z1464 Milepost Shapes (star)
Z1371 Blue Assortment Buttons
Z1614 My Creations Memory Game box
All products can be ordered HERE!


12 comments:
OMG! Stinkin cute box, I may have to make on for my father-in-law, with pictures with his grandsons.
:)
Corina Mitchell
MyCreativeInk.org
I really like your box. Great idea, and Dreamin' is still one of my favorites. :)
Love this! Love this paper pack, love the use of the stamp set - the whole thing is perfect! Adorable!!
Okay, this is genius! Love it!
What a clever way to use this box!! THANKS so much for sharing and inspiring me!
Love the idea! I'd really like to know how to make one!
What a clever idea! Love it!
Amazing Idea Angela :) Thanks so much for sharing!! I will definitely be adding one of these to my "to do" list of gifts. :)
Now how creative is this! What a cool project and thanks for the awesome tutorial.
That is a really cute idea! Your box is great!
What a neat way to use this product! It's looks fabulous, too.
Fantastic project...love it all! TFS!
Post a Comment